Searching and browsing
Everything you need to know about SIP discovery in Enduro
SIP browse page
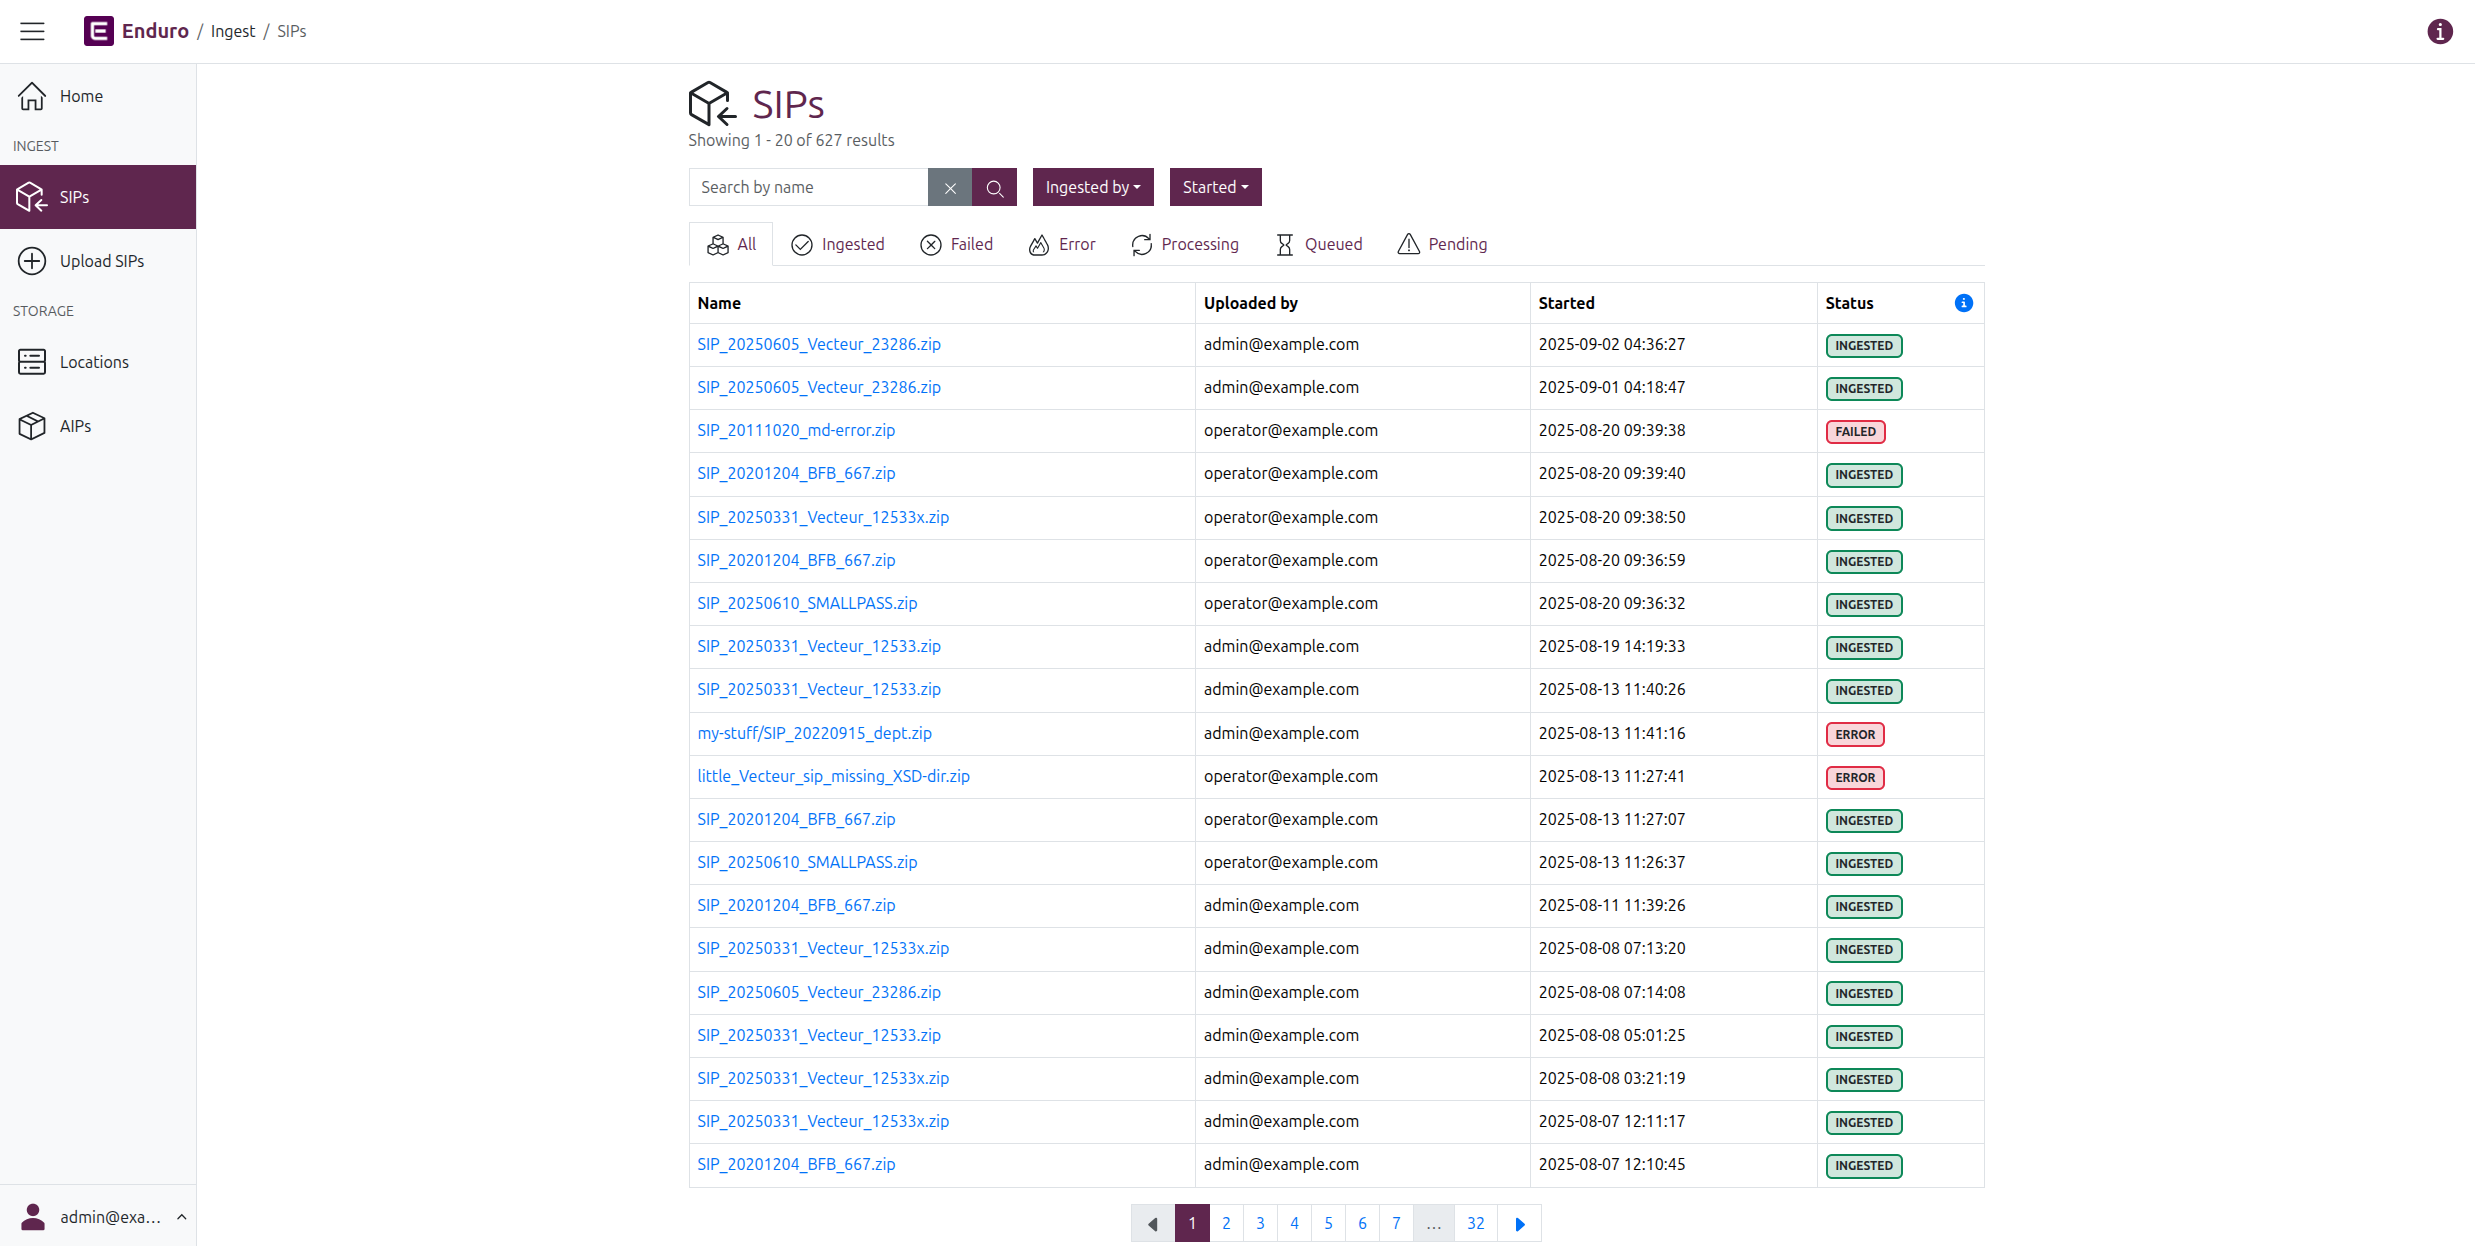
You can navigate to the SIP browse page from anywhere in the application by clicking the "SIPs" link in the navbar on the left side of the screen. Enduro will then redirect you to the SIP browse page:
Browsing results
By default, the SIP browse page will show 20 results per page. If you have ingested more than 20 SIPs, a pager will be included at the bottom of the page, with a results count listed beneath it. A list of the current and total SIPs is also included at the top of the page, beneath the page title.

The SIP browse page includes a count of results at the top and bottom of the page
SIP results are presented in a table with the following columns:
- Name: The name of the SIP.
- Ingested by: The user associated with initiating the SIP ingest. How user information displays in this field depends on whether authentication is enabled and what information is available from the provider - for more information, see: User filters and authentication configuration
- Started: The timestamp of when the related ingest workflow began. Internally, Enduro will store timestamps in Coordinated Universal Time (UTC). However, the user interface will then render those timestamps based on your browser's or operating system's configured timezone settings.
- Status: The current status of the SIP.
SIP statuses
Clicking the blue ( i ) info icon to the right of the "Status" column header in the browse results will display the SIP status legend:
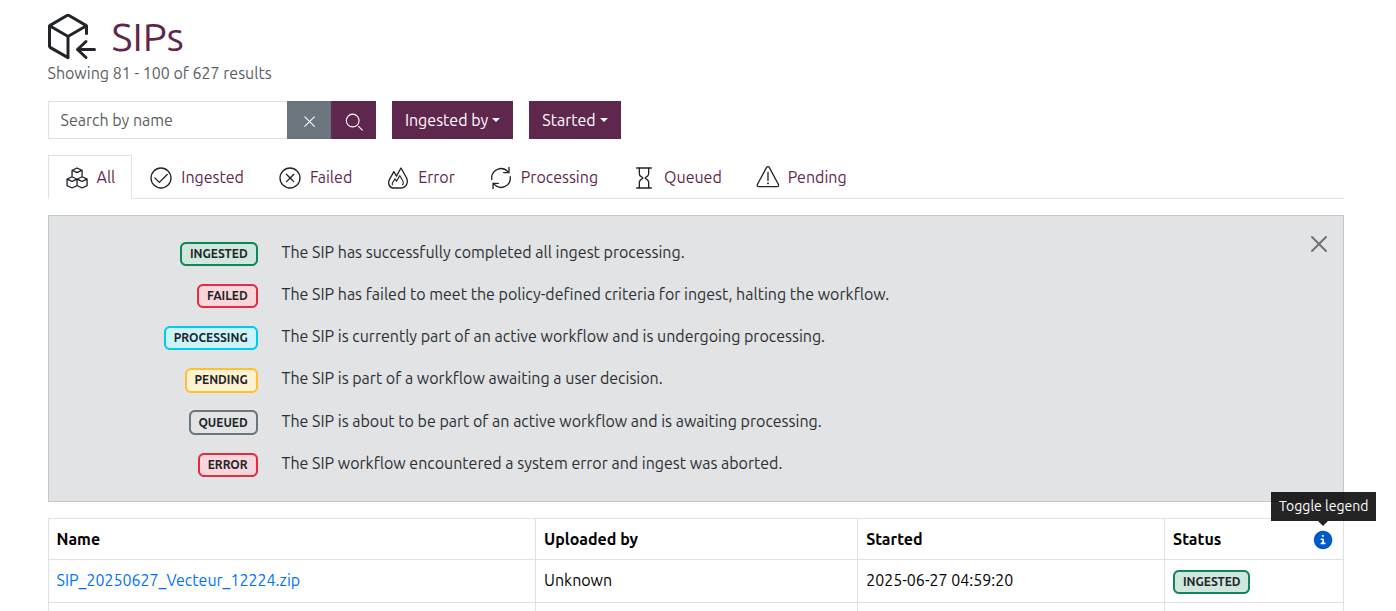
SIPs can have the following statuses:
- INGESTED: The SIP has successfully completed all ingest processing
- FAILED: The SIP has failed to meet the policy-defined criteria for ingest, halting the workflow
- PROCESSING: The SIP is currently part of an active workflow and is undergoing processing
- PENDING: The SIP is part of a workflow awaiting a user decision
- QUEUED: The SIP is about to be part of an active workflow and is awaiting processing
- ERROR: The SIP workflow encountered a system error and ingest was aborted
Tip
Workflows and tasks also have their own statuses - see the Managing ingest workflows page.
Using the pager
The pager is a navigational user interface widget that is shown on any browse page with more than 20 results.

An example of a pager on the SIP browse page
The current page will be shown in purple. The pager will show up to 6 other active pages as white with blue hyperlink numbering - click any of these to navigate to that page of results.
You can also click on the < Back and > Forward arrows on each end of the pager to navigate to the previous or next page. If either of these icons are shown in grey, this means they are inactive - there are no further results in that direction.
Enduro will also include grey ... ellipses to indicate that there are additional pages between the currently enabled adjacent results and the first or last results (as shown after page 1 and before page 30 in the image above). These indicate that more page results are available between the two active pages. Click on one of the adjacent active pages to show those page results in the pager.
For example, to access page 14 in the pager shown above: click on page 11. Now pages 12-14 are active and can be clicked:

When page 11 is clicked, pages 12-14 are now shown
Some intermediate pages may require multiple clicks to access. For example, getting to page 23 of the results might mean first clicking page 30 and then page 24 before page 22 is available in the active pages shown.
Searching and filtering
The SIP browse page also includes a basic SIP search box and some filters that can be applied to limit the results shown.
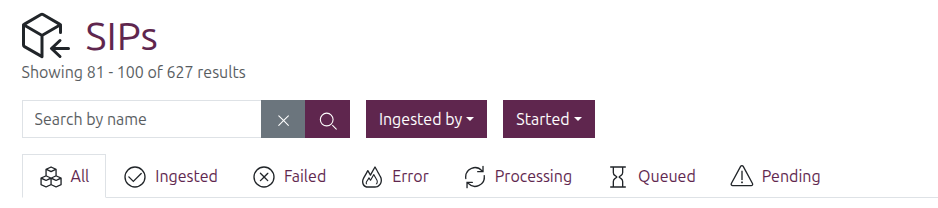
SIP search
To perform a search, enter a term in the search box and then either press enter or click the purple button with the magnifying glass icon. Once entered, the count of results at the top of the page will update based on the outcome of the search.
Clicking the grey button with the X icon will clear the search box and refresh the results.
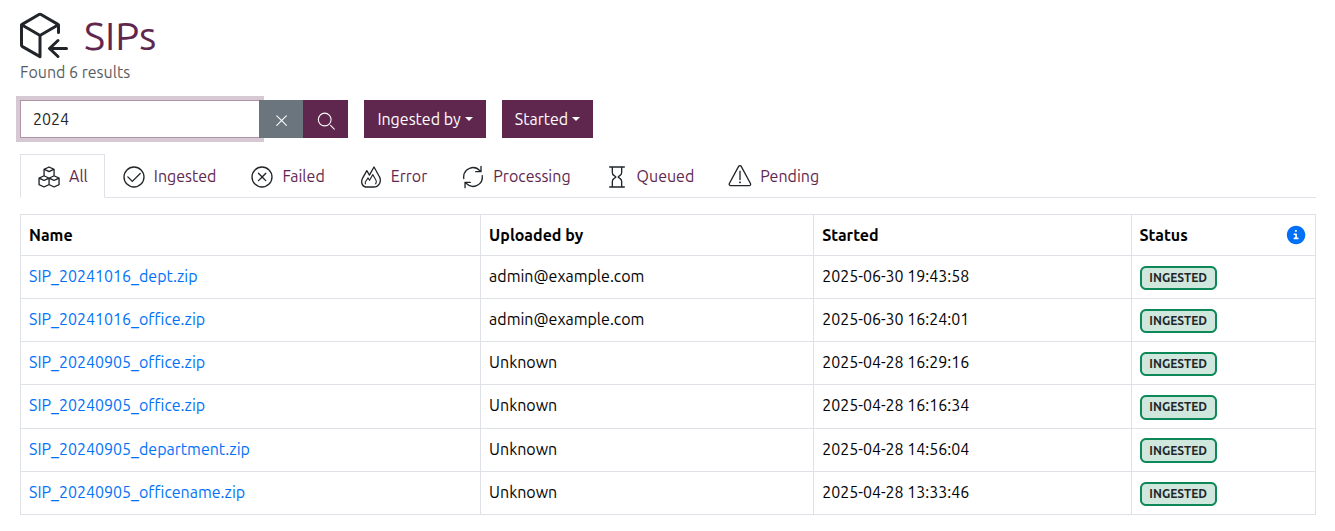
Currently, the SIP search will only search against SIP names. Enduro will
return matches from any part of the name - so for example, searching for
star would return titles that include "start," but also "restarting,"
"morningstar," etc.
Important
Searches are CASE SENSITIVE. Meaning a search for FEB would return
SIPs whose names include "FEBRUARY" but not "February," "feb," or any other
casing variant.
If you are not sure of the results you're seeking in advance, you may want to try your search with different casings to ensure you've found all relevant results!
Filter by SIP status
SIP browse results can be filtered by status by clicking on one of the tabs shown above the results table. By default Enduro will show all results.
Clicking on one of the other tabs will immediately limit the results to those SIPs with a matching status, and the result count at the top of the page will also update.
Tip
To help operators better understand the cause of an unsuccessful workflow, Enduro uses different statuses for a content failure and a system error. For more information, see:
Filter by uploader
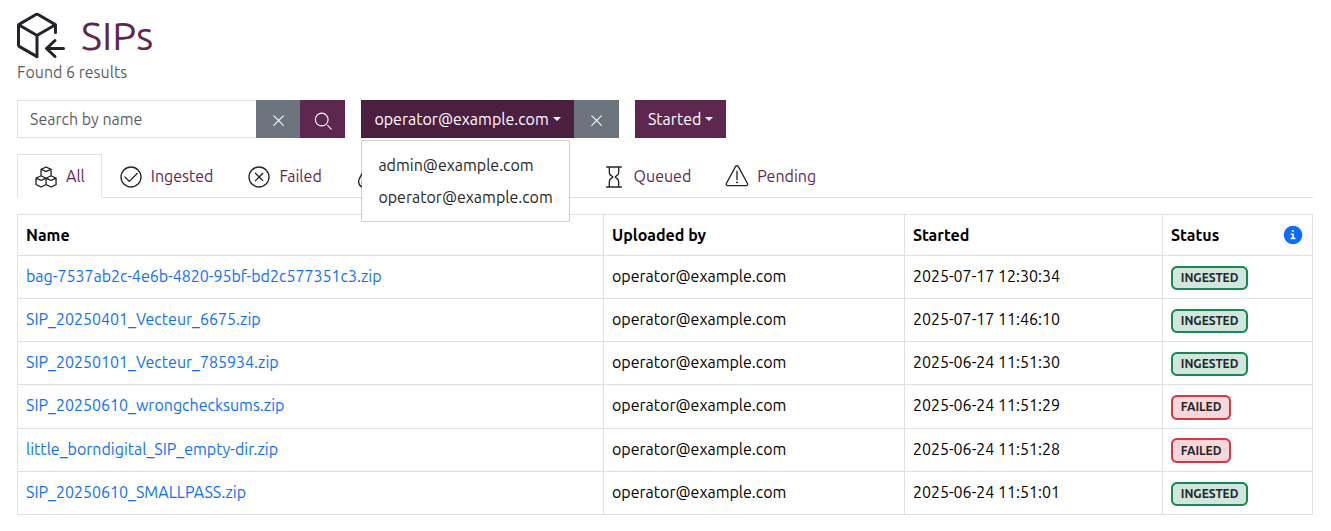
If authentication is enabled, you can also filter SIP browse results by who initiated the ingest. Click the purple "Ingest by" button to show the drop-down menu with available user options.
Options shown in this drop-down may be a mix of names, emails, and even UUIDs, depending on what user properties are available from the authentication provider. For more information on how Enduro tries to display ingest user information, see: User filters and authentication configuration.
Note
If authentication is not enabled and/or the identity of the uploader cannot be known, Enduro will simply show "Unknown" in the Ingested by results column.
At this time, "Unknown" is not included as a filter option.
When applied, the username (or email, etc) will display in the purple button, showing that the filter is applied. The results will update immediately, as will the count of results at the top of the page.
You can click the grey X button on the right of the button to clear the applied filter.
Filter by ingest start time
SIP browse results can also be filtered by the time the ingest workflow started.
Click the "Started" filter button to reveal the drop-down menu and configuration options. The filter includes a number of preset time ranges, as well as the option to enter a custom range.
The preset start time range options include:
- The last 3 hours
- The last 6 hours
- The last 12 hours
- The last 24 hours
- The last 3 days
- The last 7 days
To apply one of the preset ranges, simply click the "Select a time range" drop-down and select one of the values. The "Started" filter button text will update to show your selected time range, and the results will be filtered immediately.
Alternatively, to configure a custom range, use the "From" and "To" fields in the drop-down menu. Clicking into either field will display a calendar widget that can be used to configure your time range.
In the calendar widget you can click on:
- Any date in the calendar to select a day
- The month shown at the top of the calendar, to reveal a month picker
- Alternatively, you can use the < Back and > Forward arrows to shift the displayed calendar forward or back by one month
- The year shown at the top of the calendar, to reveal a year picker
- The hour or minutes shown below the calendar, to show pickers for
these
- Alternatively, hovering over the lines above and below the time elements reveals them to be up and down arrows - click these to increment the time forward or back
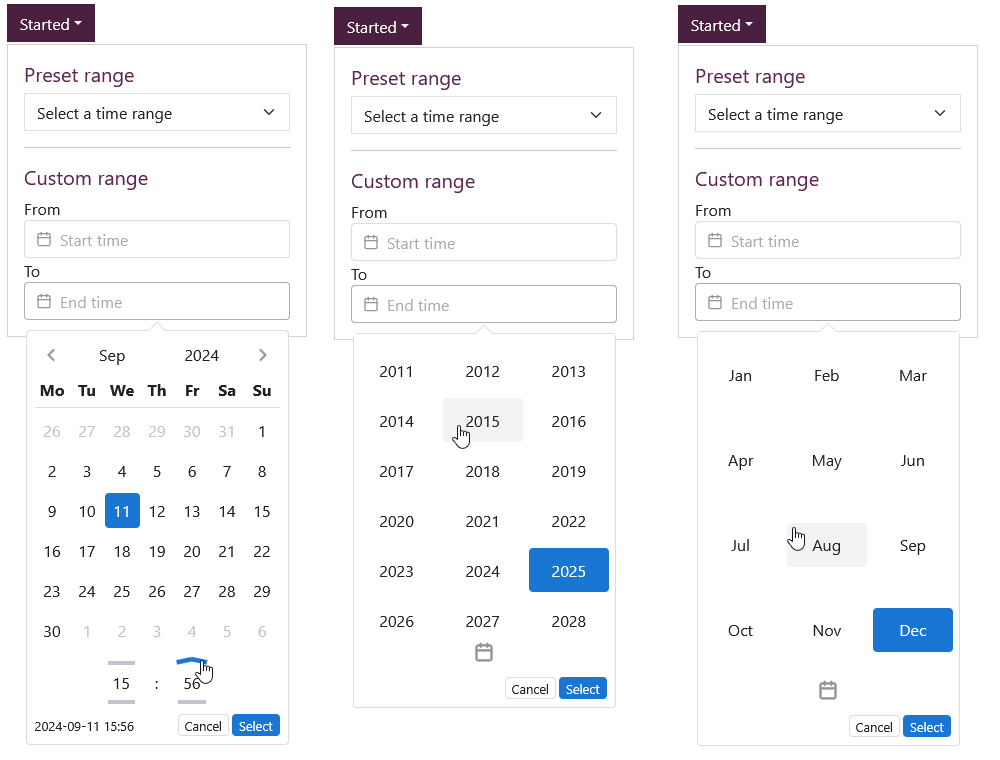
The calendar widget provides a number of different ways to configure your range
As you configure your range, a preview is shown in the bottom left corner of the calendar widget. You can click "Cancel" to clear all previous selections and close the calendar widget, or click the "Select" button in the bottom right of the widget to finalize your range.
Tip
You don't have to configure both "From" and "To" fields to filter results. For example, to see all SIPs ingested since the start of the year, you can set the "From" field to January 1 of the current year, and leave the "To" field empty.
Once your range is configured, the Started filter button text will display the word "Custom" to indicate that a custom range is applied, and results will be filtered immediately.